Jan 20 2009
fleece twist
Yesterday I was able to spend some time with my Mom and we took a trip down to L.A.’s fabric district. She’s been many times to get the fleece she needs for blankets she makes to sell for fundraisers at work, and I’ve just never been able to tag along. Yesterday was a great opportunity since Don had the day off work so he could be with the boys while I spent some time with my Mom. I was amazed at all the fabric! It’s fun to walk around and see all the different textures and prints. I did find a “favorite” but I’ll have to share that later. 😉
I was happy to find a fleece print that I thought Don would like. He’s been stealing my fleece cupcake blanket that my Mom made me for my birthday last year, for movie watching. I’ve been wanting to make him one for a while, but sometimes it’s hard to find a print for men who aren’t big into sports. I love the one I found for him and started working on it today.
I didn’t want to do knots because I wanted the edge to lay more flat. I remembered how one of my Mom’s friends from church was tying her fleece blankets the last time I saw her and decided to give it a go. So, this is totally not my idea, but I love it and wanted to share it with you, too.
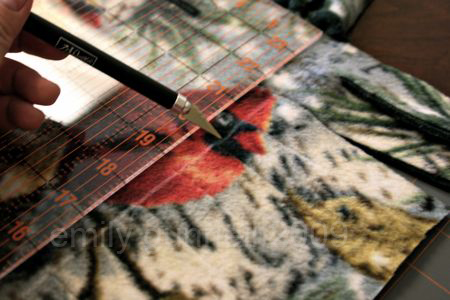
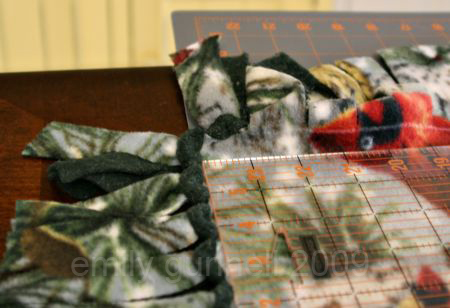
I start out by cutting a 4″ square out of the corner, then marking a line using the ruler and tailor’s chalk down the length of the blanket, and cut down to the line making the fringe 1″ wide.

Next I use my craft knife (mine’s from Stampin’ Up! but any craft knife will do) and I make a 1/4″ slit starting at the chalk line. I found that I need to insert the knife thru both layers, then slowly cut the slit. If you’re using wider fringe, you may want to make the slit a little longer – test on the square you cut from the corner! You don’t want to cut it too long because you don’t want to see the hole when you’re done.
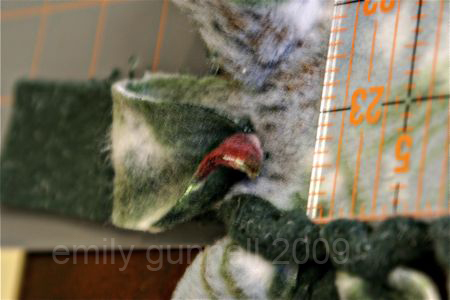
Next, I take the top layer and thread the corner thru the hole making sure to go thru both layers.

Next, I thread the bottom layer thru the hole, using the top layer to help make the hole easier to see.

Now I have both layers going thru the two layers of the blanket. I can now start pulling them thru the hole. Take care during this step. I usually hold the blanket by the base of the hole down with my thumb while I work the two layers thru the hole.
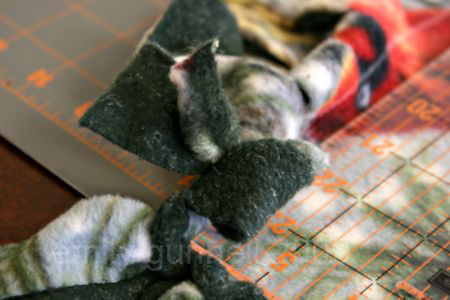
You can see here that I’m working on getting them thru the hole. Sometimes it’s better to pull one all the way thru, then the other one.
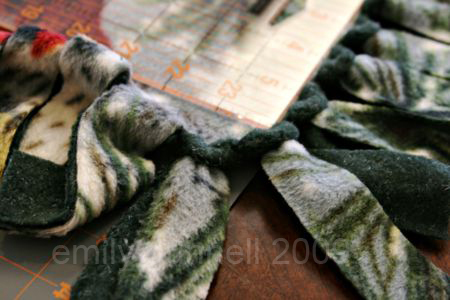
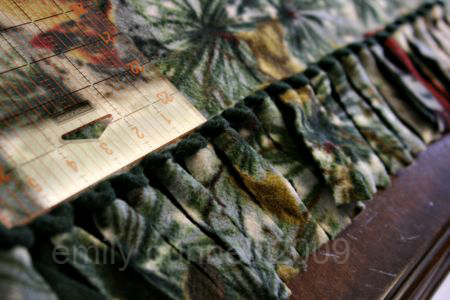
When you are done, you’ll have a nice edge with the bottom layer making a contrasting edge around the blanket.
I love how it looks and hope to have it done by tomorrow. This is a 2 yard blanket and should keep him from stealing mine away! LOL!
6 responses so far


Very cool!!! He will love it!!!!
That looks very nice and easy! (I hope) 🙂
What a great idea. Thanks for sharing!
Hi Em! Great tutorial! I like that much better than the knots! ‘Knot’ so lumpy..LOL
I want to see more of the stuff youve been sewing!!
Thanks for the alternative way of doing the fringe! That’s a GREAT idea, and I love how it lays much flatter. You are GOOD!!! 😀
KeyUTTTTTE!
Hiya Pix! 😉